My Little Cottage – It’s Porch Time

My Little Cottage in the City continues to undergo a major facelift ever evolving into the sweet, charming place I love to call home. One of the spaces (or non-space) that we thought would be the last to tackle is the porch. However, with its proximity to the quiet, secluded back yard and a gurgling waterfall pond, it is now one of my favorite spots in the cottage. Most days you will find me glancing at magazines or books, or enjoying an afternoon nap in this little spot.  Even in inclement weather with the pattering of rain on the roof, I love to be curled up on the sofa enjoying a cup of coffee in this cozy room.

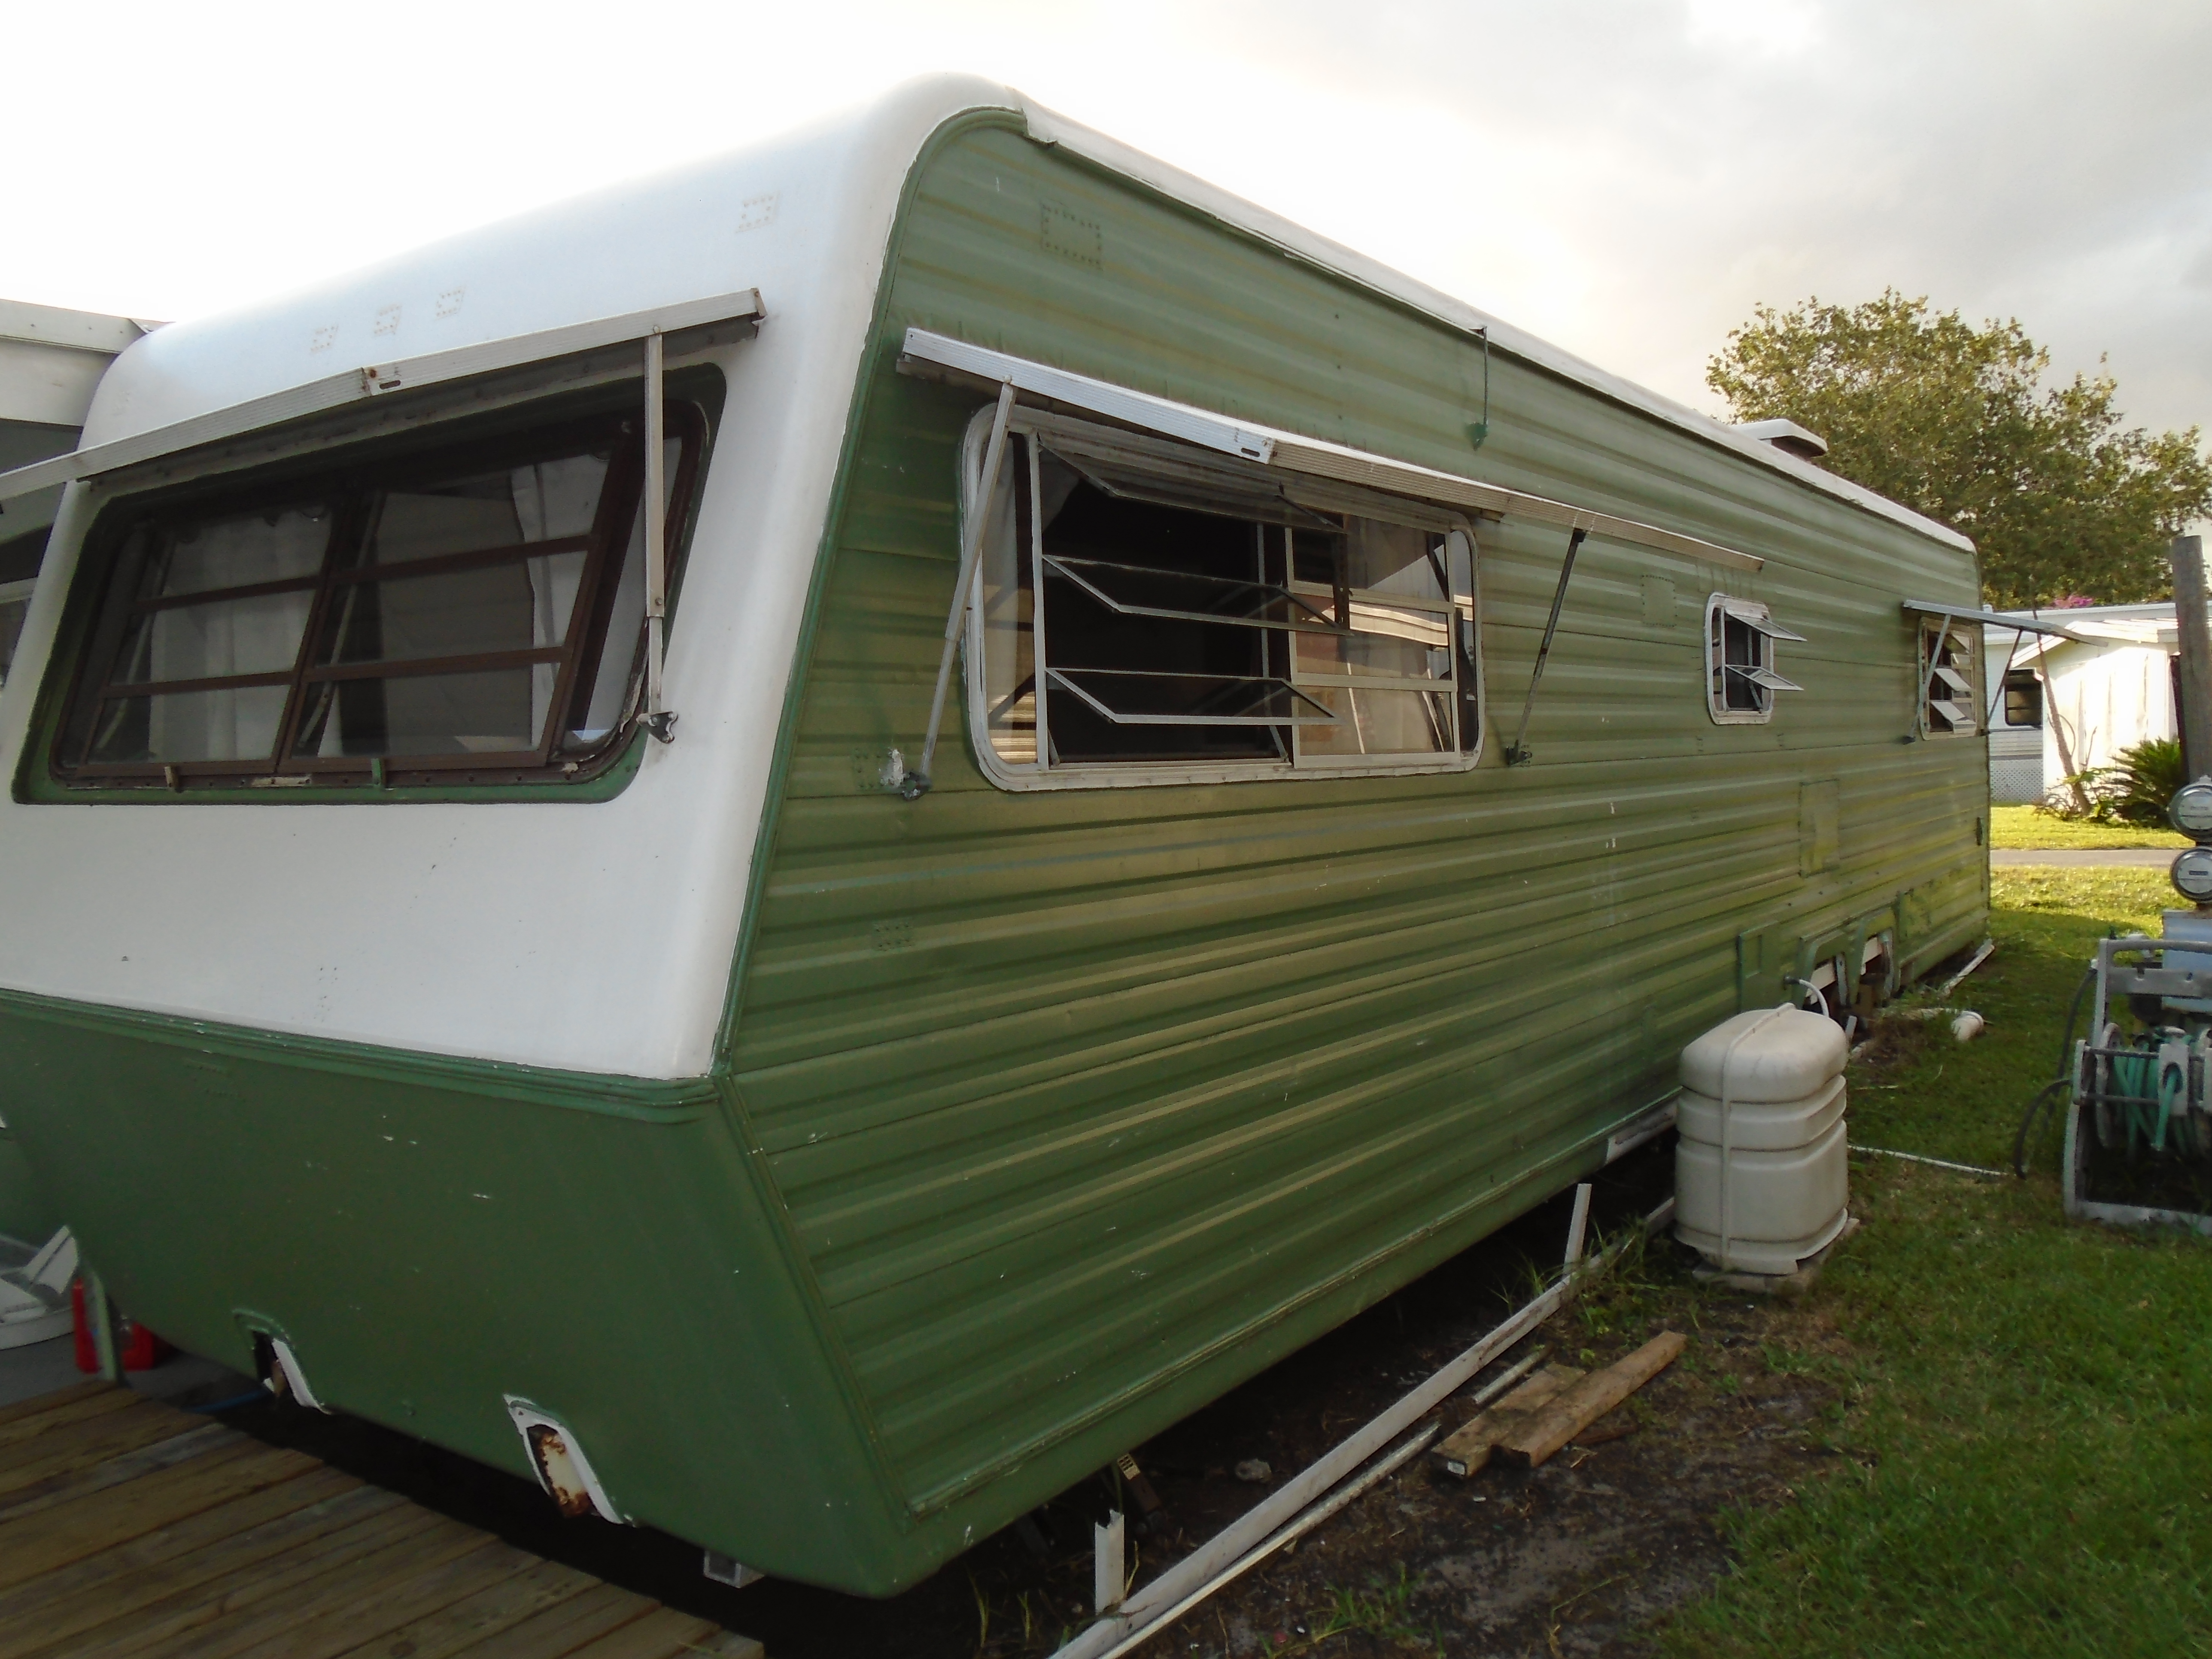
When we first purchased our little cottage, there was nothing remaining of the porch except a cement slab and remnants of some sort of former structure. But we were not deterred.
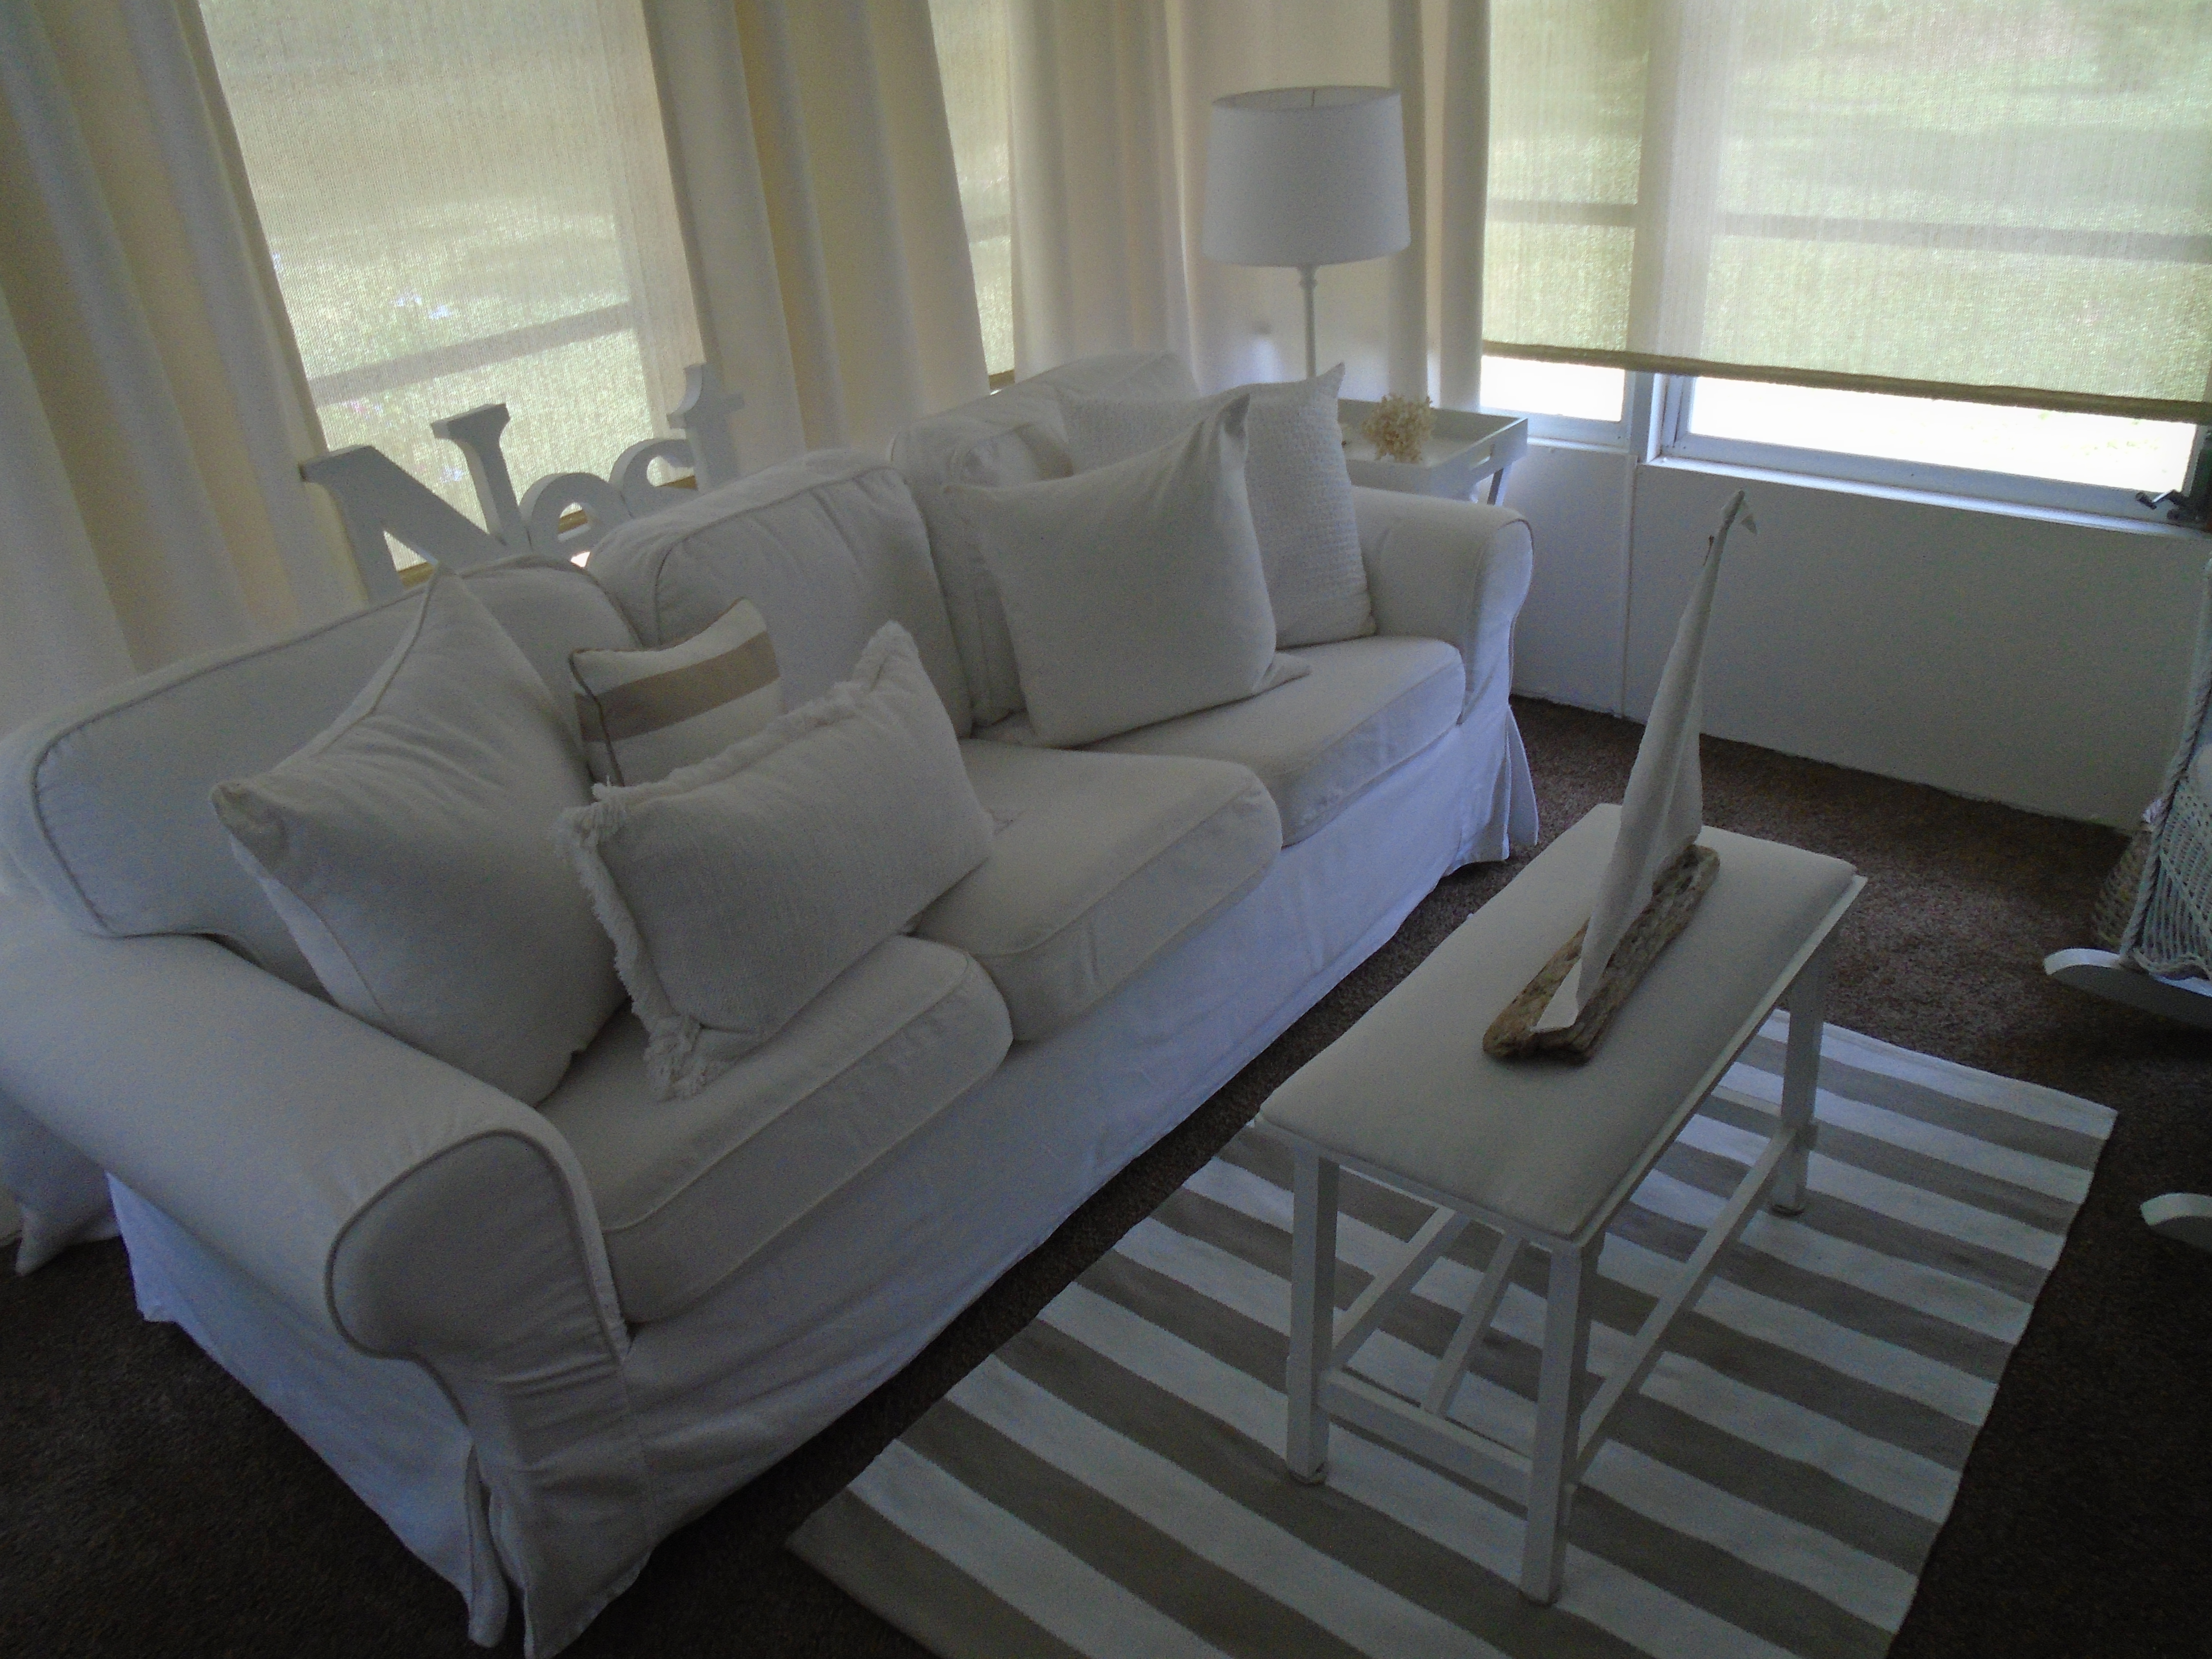
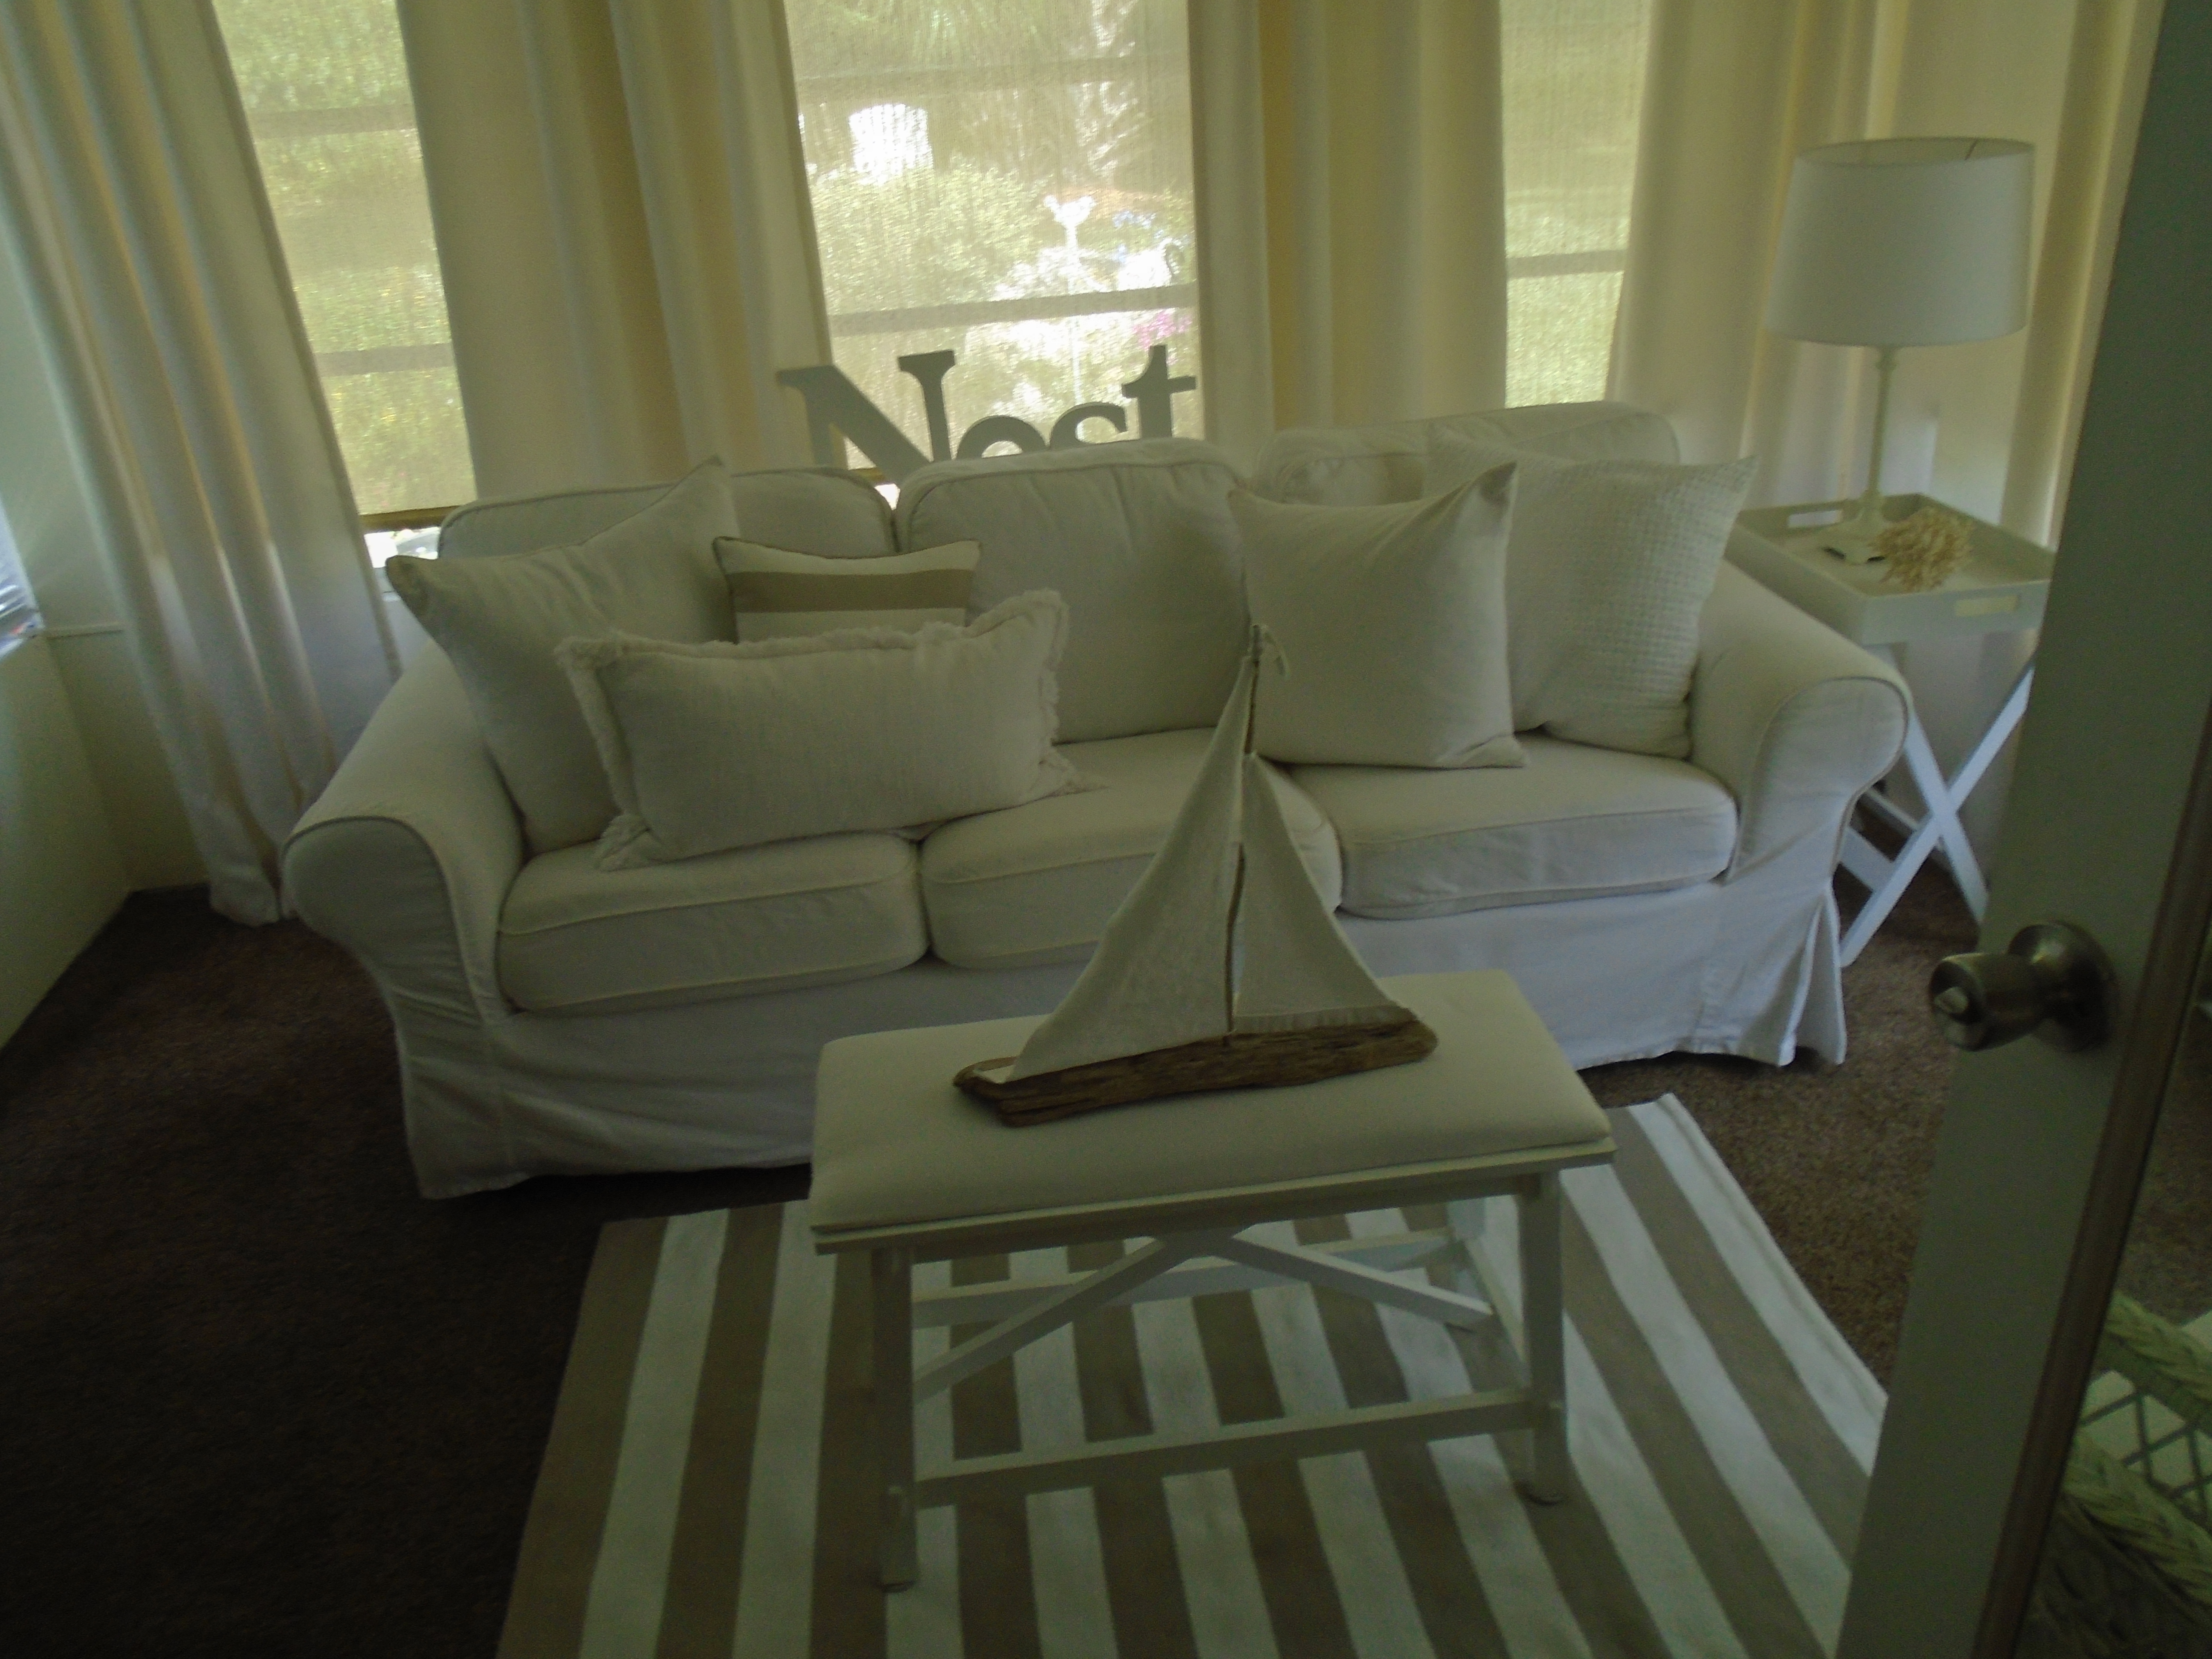
View of back porch

Another view of porch

Our first attempt at this little room was to build a screened porch, using the slab as the floor and adding walls and roof and giving all surfaces a fresh coat of white paint.  The roof (ceiling) of the structure was a simple build, using materials we had on hand and thus proved to give the porch ceiling the cottage feel we so love.  We also built a simple wall structure and added window screening along with a leftover screen door from other projects.  And even though this was a great space, we found we couldn’t use it in the heat of the southern summers and the screens just didn’t prove to be as useful as we thought to keep out inclement weather.  So what did we do?

The porch roof and walls

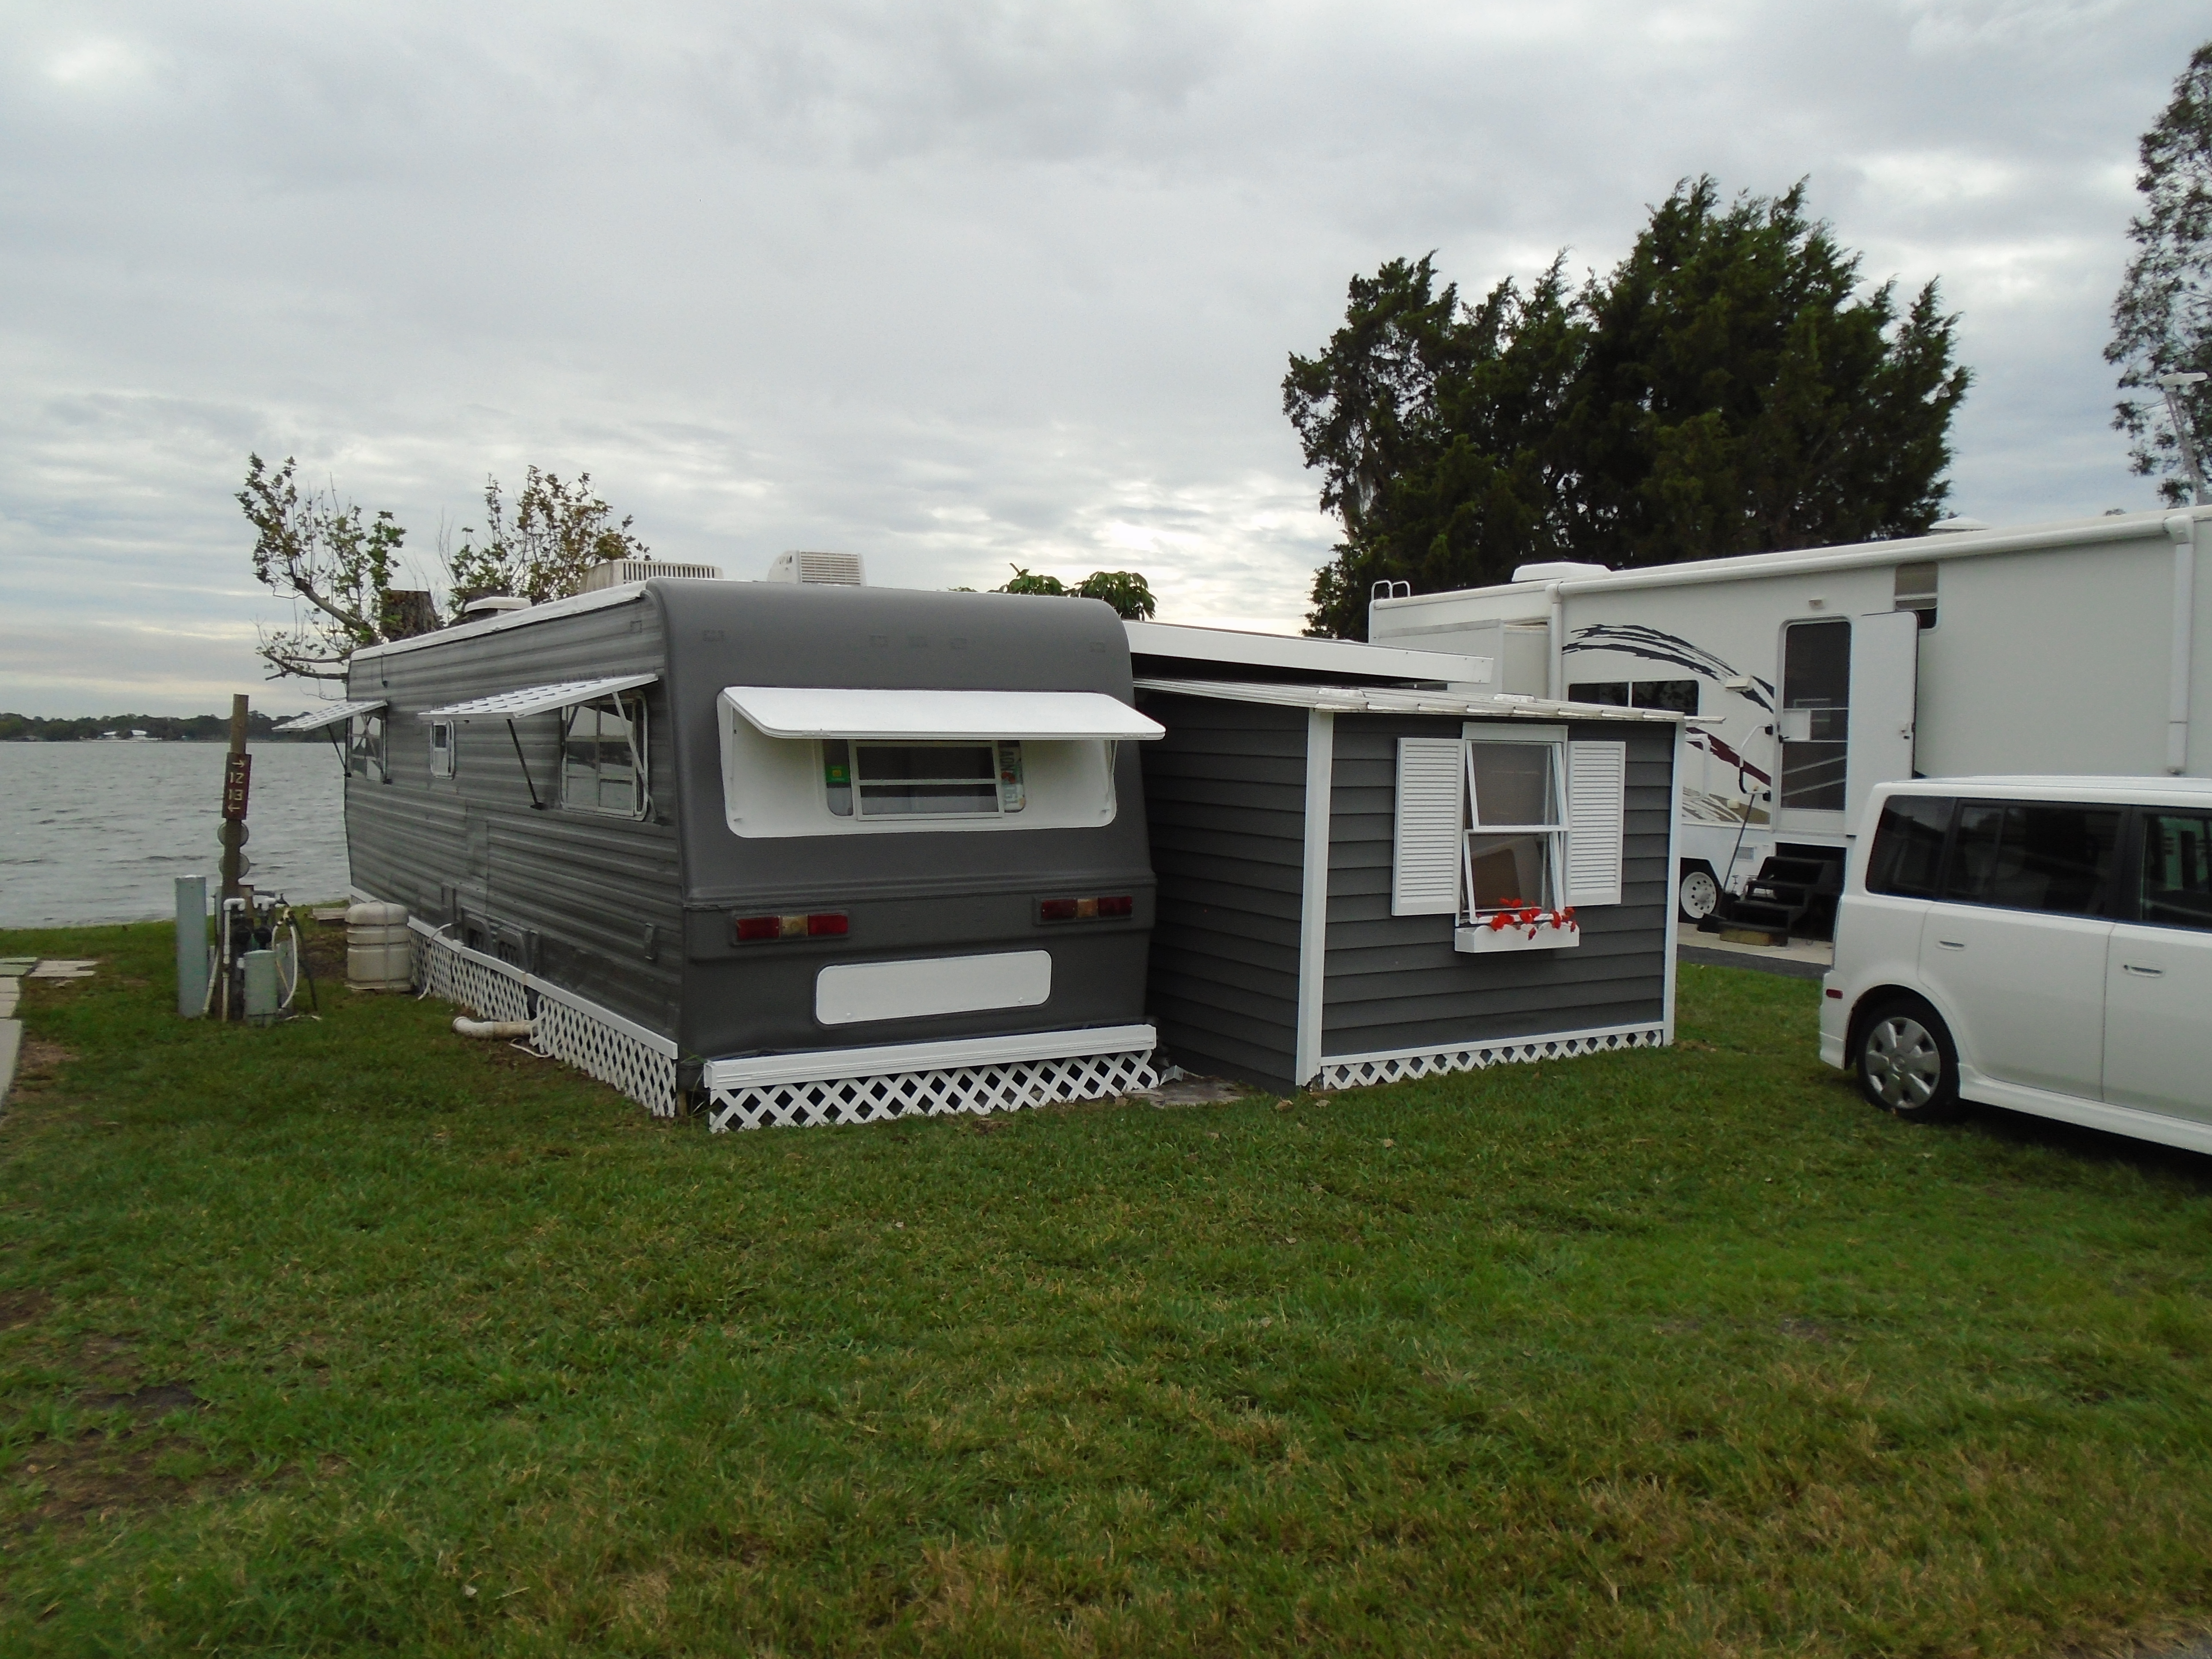
The outside view – windows are in!

Scouring Craigslist, we were able to secure a load of windows locally for  almost nothing, four of which we couldn’t use and were able to resell, thus making our out-of-pocket costs for these beauties minimal.  After putting in the windows, we next used an old French door taken out in another part of the cottage as our porch entrance door.  With the addition of a carpet remnant found at our local home improvement store, two vintage wicker chairs found at a local consignment store coupled with our Ikea sofa from our living room, my little porch was taking shape.  But it still needed more.

Carpet is down

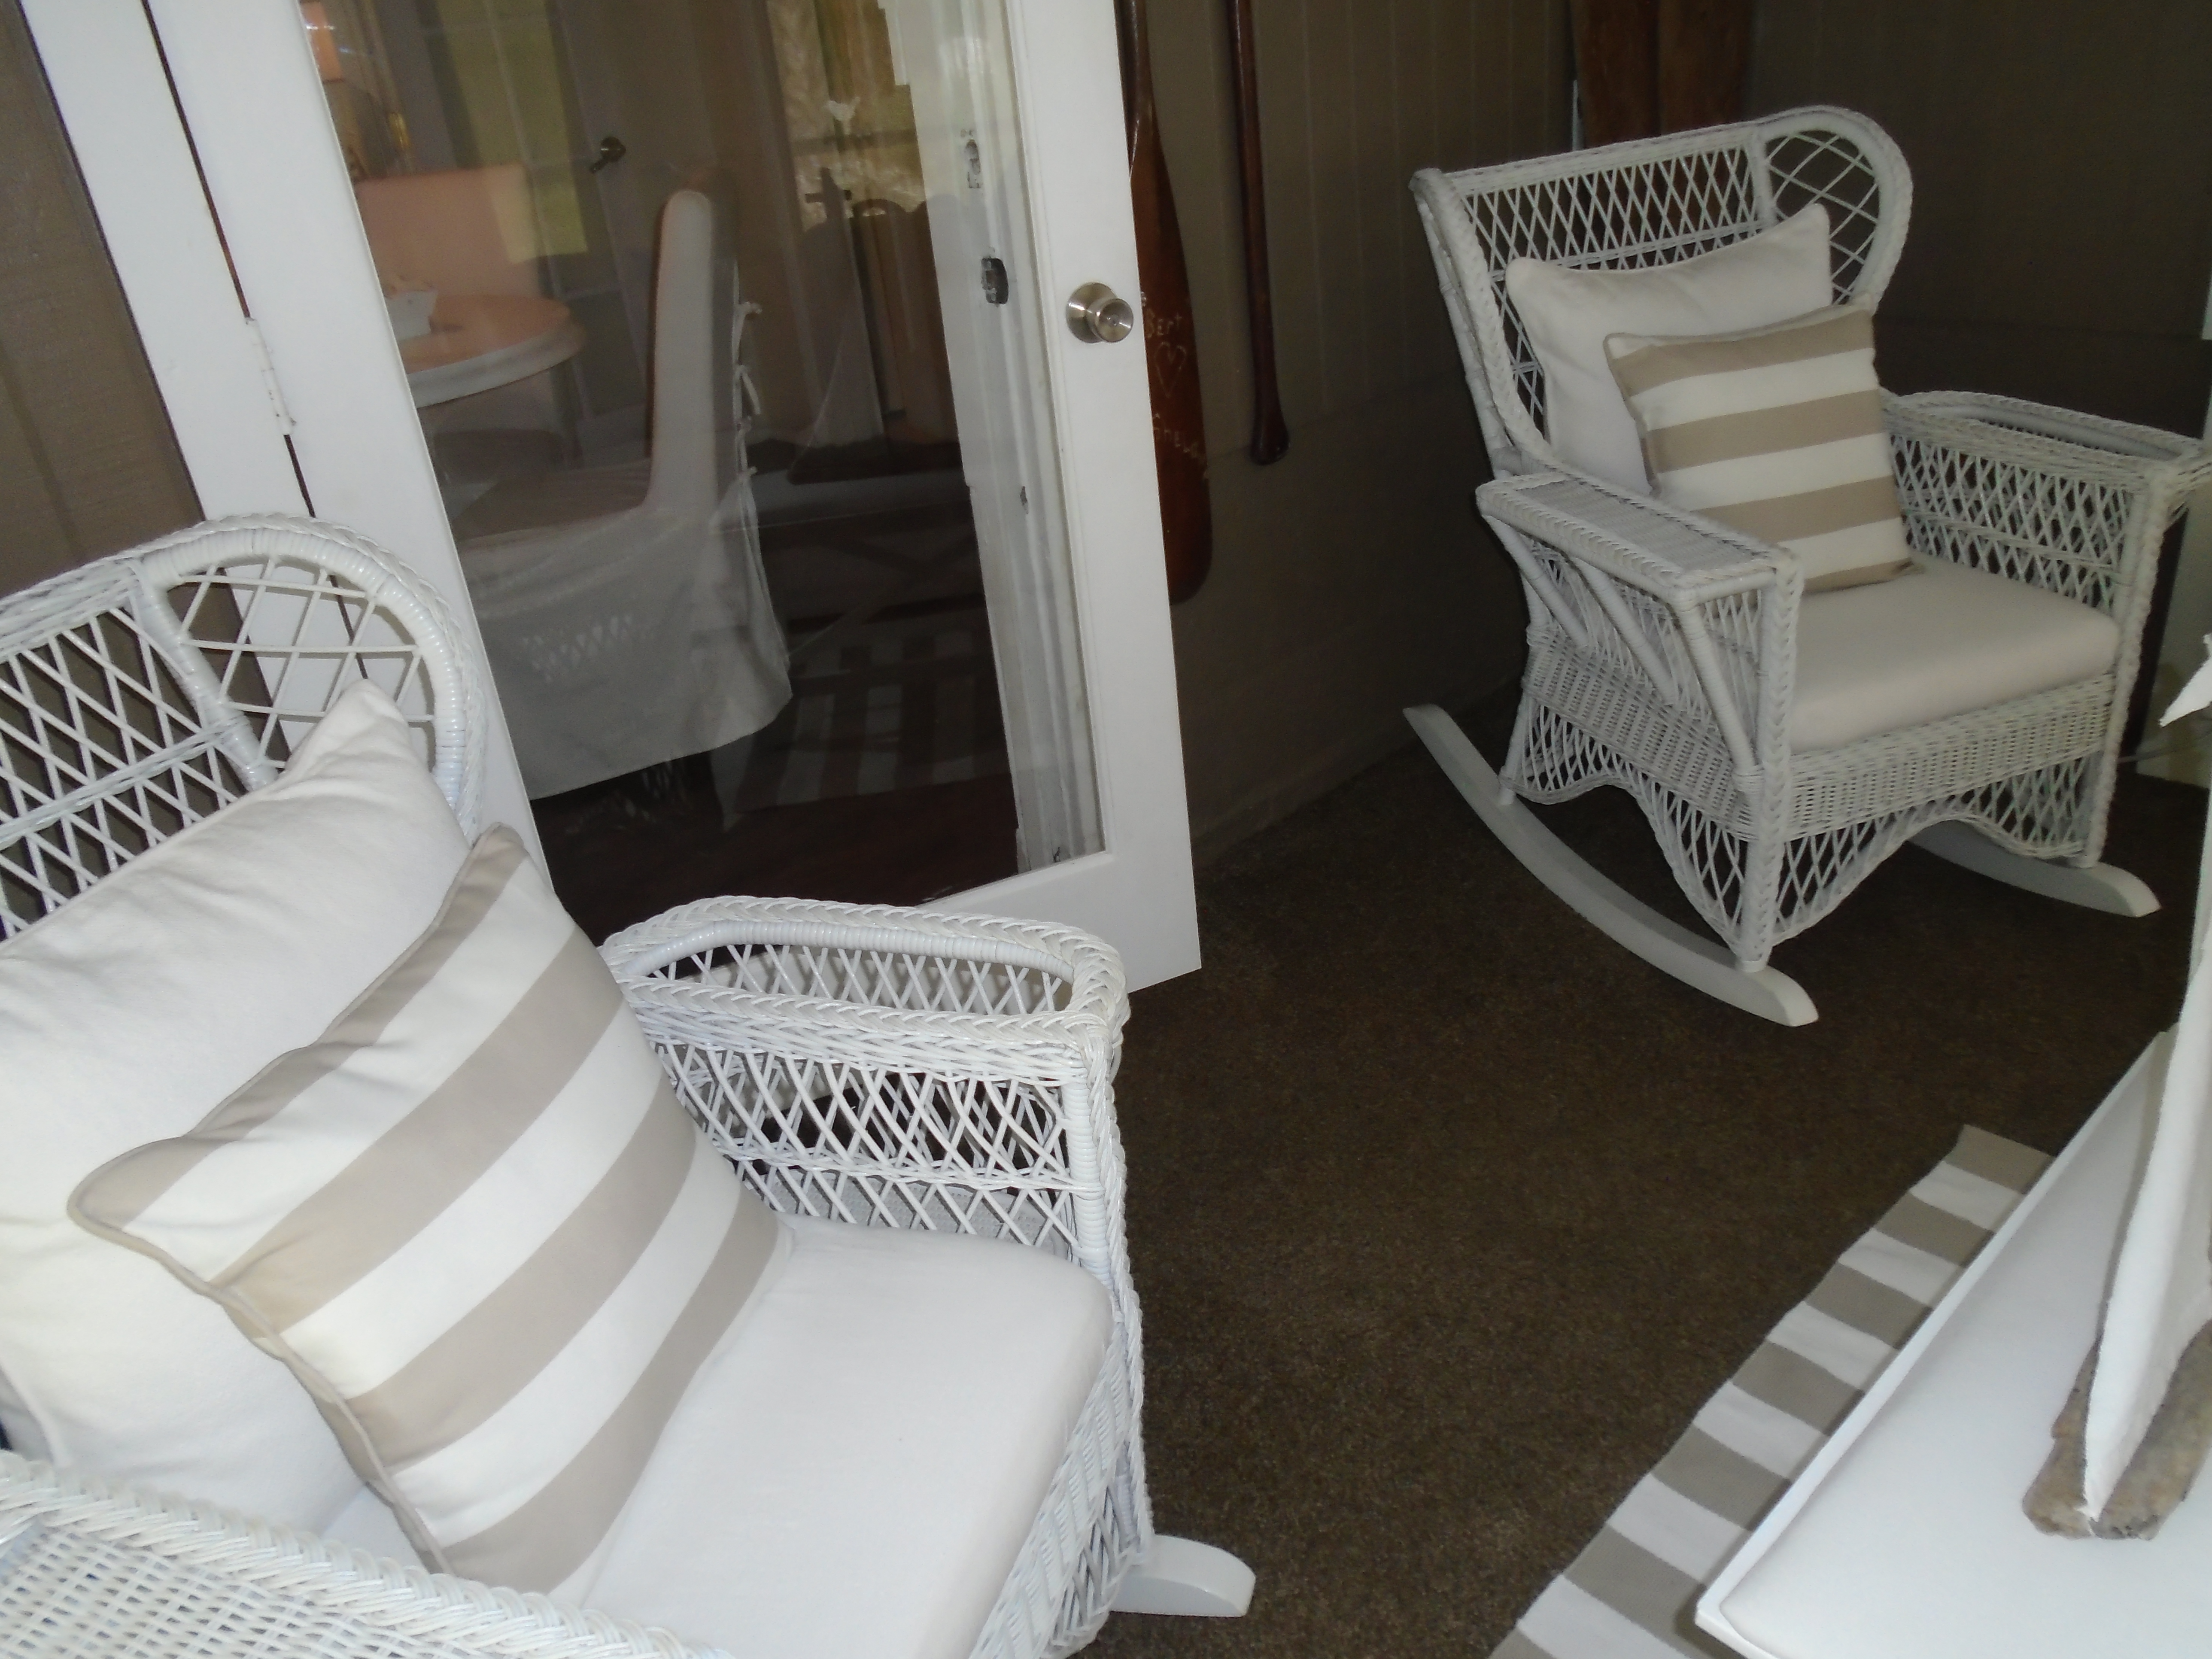
Vintage wicker chairs


Old oar with barnacles – adds so more charm!

So once again, sourcing local thrift and consignment stores, I was able to find three old oars (one with actual barnacles still on it) and also used an “X” end table taken from another part of the cottage.  I also decided to use my beloved driftwood boat (which I gave a little makeover) and also took the bench I had at the end of my guest bed to use as a coffee table and added a cushion to it made from leftover white curtain fabric.

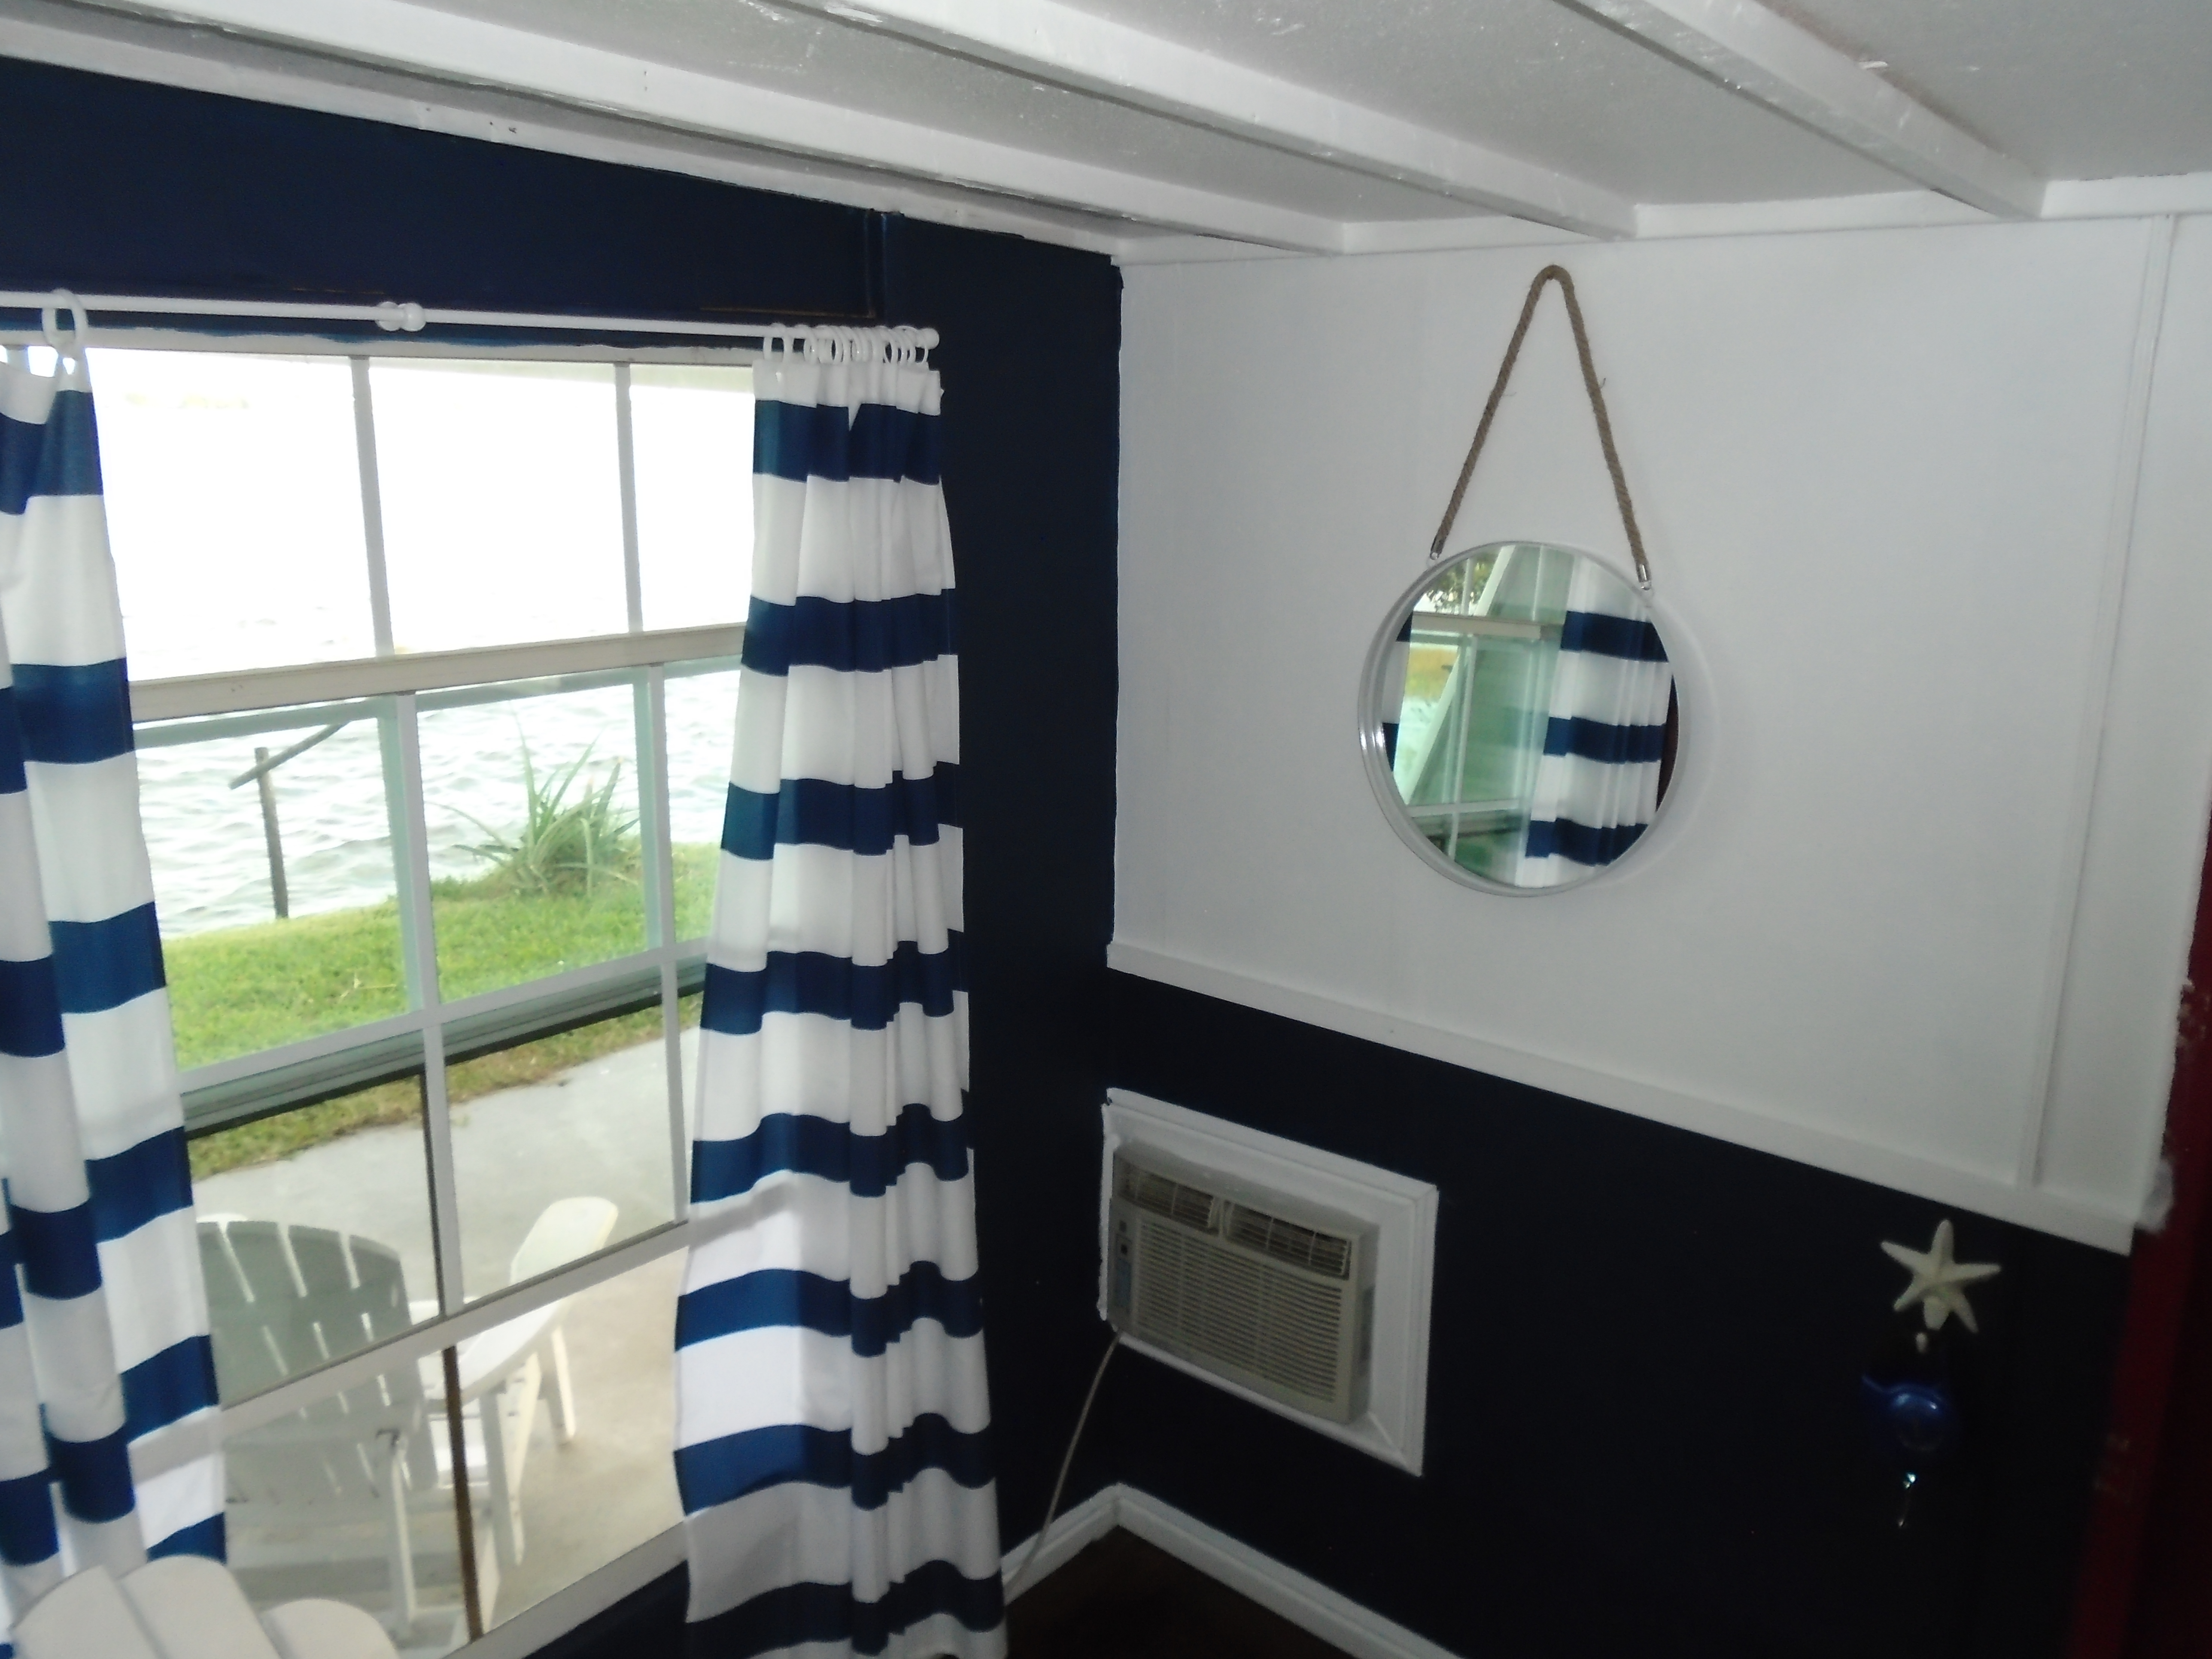
Next,  I found a cute, clearance-priced striped rug online (which I thought would add a hint of nautical flair) and added striped throw pillows scarfed up at my local home store.  I found the large “Nest” sign at a local flea market and although I had other ideas of where it would go originally, it added just the perfect touch behind the sofa and exemplifies the feel of the cottage.  I also added used white lined curtains, solar shades and mini-blinds for privacy and added a white table lamp;  all which add texture to the space and give this tiny space a light airy feel.  A new air conditioner (a must in the southern state we live in)  rounds out the items in this porch

Renovating our little cottage in the city has truly tested both Mr. Mobile Cottage and I.  Our initial ideas of what we thought our cottage could be have been executed, scrapped, revamped and reinvented, and are always being tweaked, such as our little porch.  But in doing so, this cozy, charming, cocooning spot is now one of the favorite spots to enjoy in the cottage and what can be better than that?

Our cute porch now!

Another view

More reveals are coming!


Tiny Lakeside Cottage – The “Alcove” Renovation

Our newest project,  the Tiny Lakeside Cottage, came with a plethora of problems and approximate 350 square feet of unique small space solutions. One of these spaces is a weird alcove space found just inside the main door.

Featuring a huge window providing a wonderous view of the lake, this teeny space presented me with my first real dilemma as our renovation began.  In addition to the three (yes, 3) different wallpaper applications in different colors, a must-have, built-in wall air conditioner just added to the difficulty in trying to set up this space. (see below)

The alcove space before - 3 wallpapers in different colors!

The alcove space before – 3 wallpapers in different colors!

We first eliminated the wallpaper and painted the walls blue and white to add dimension to our tiny place. With the addition of a chair rail, floor molding, two shower curtains I decided to use as curtain treatments, along with a mirror I found at my local home store, I knew I had a good start, but was still unsure of how to use this space.

Spying the cute metal table and chairs I had been using outside, I quickly brought them in and they fit perfectly in this awkward space. With the addition of a nautical lamp (or other decorations I swap out seen in future posts) I can now utilize this space for eating, blogging, or simply day dreaming and can easily take the table outside as well when needed.

While we have a ton of work yet to complete on our tiny abode, I have found that even the most awkward, little spaces can be fully utilized…all you need is a little imagination and in my case, a wonderful view of the lake which I enjoy in my new, multi-purpose, teeny-tiny dining room!  What can be better than that?

Stay tuned….more posts coming soon!!

After painting and curtains!

After painting and curtains!


With the addition of a rug, table, chairs and lamp!

With the addition of a rug, table, chairs and lamp!


Addition of mirror

Addition of mirror


My New “TINY” Lakeside Cottage

While I have hinted that Mr. Mobile Cottage and I have been knee-deep in another project, I now want to share with you our journey of transforming our latest Tiny Lakeside Mobile Cottage (referred to in future posts as my Tiny Lakeside Cottage)

Coming in a whopping 350 square feet, our latest renovation project has tested almost every aspect of our renovation knowledge and skill set and the journey is well from over yet.

While we LOVE our cottage abode I’ve been blogging about, we are landlocked in the city and yearned for a little place on or near the water that could serve as a secondary home.  Then one day, I saw an ad for a sad-looking, but permanent RV located on a lake that with proximity a little over an hour from our cottage.  While I knew it might potentially be just the little escape we had been looking for, convincing Mr. Mobile Cottage that it was worth looking at took some coaxing.  But being a good sport, he reluctantly agreed, and the rest, as they say, is history.  Smitten with a gorgeous lake view, we quickly scarfed up this tiny abode and hoped for the best, after all, it was being sold, AS-IS!

Our lake view!

Our lake view!

454


The best way to describe this tiny place is that it is an older RV permanently stationed now with an enclosed carport, shed and lakeside porch.  Needless to say, being only 350 square feet, and never having renovated a space so small, this was going to be challenging.  Couple that with what we have since discovered during our renovation and this might just be our biggest challenge yet!  But with a wealth of determination to make this into our dream Lakeside Cottage, we forged ahead with a strict budget and started the transformation.

RV outside "before"

RV outside “before” after initial deep cleaning and debris cleanup

Another view - YIKES

Another view – YIKES!!


Both the inside and obviously the outside of this place needed a lot of work.  Shoddy renovations, a “leaning” RV and general neglect had left this lakeside gem seeing better days.  First, we needed to usher the critters that had decided to take up residence back outside.  A deep cleaning all around coupled with a hearty dose of bug bombs took care of almost all the critter problems, but the “additions” had not been properly sealed up, actually, nothing had been sealed up properly for years, thus water and everything else had been handed a “welcome mat” to come on in.  Twenty (yes, 20) tubes of caulk later combined with a ton of other work,  and everything for the most part is now sealed up .

We have a LONG way to go, but progress is being made and our tiny Lakeside Cottage is starting to come into view.  And while the budget has been stretched to the limit and we still have a ton of renovations yet to do, we are making time to enjoy our tiny lakeside cottage all the while contemplating how to complete the renovations on the cheap.

With that in mind, I wanted to leave you with a picture of the freshly painted exterior of the tiny cottage to give you an idea of some of what we have accomplished thus far.  Taking simply what was already there and reinventing it, coupled with 2 gallons of gray and one gallon of white paint , our tiny escape has started its initial transformation.

After painting!

After painting and “reworking” lattice!

Even with the massive amount of work this tiny cottage has required (and what we still have to do), we have no regrets on purchasing this tiny cottage.   With our renovation vision of this tiny space slowly becoming reality, we are looking forward to being able to “escape” to our lakeside cottage and loving every minute we are there!  Stay tuned….many more reveals coming soon!